


Plopping is a heat-free way to dry wavy and curly hair. You pile soaking wet, product-loaded hair onto a smooth fabric, a cotton T-shirt or one of our microfiber hair towels, and let it dry in a scrunched, compressed position instead of hanging straight down.
The reason it works is gravity. Wet hair is heavy, and that weight stretches your curl pattern flat while it dries. Plopping holds the pattern in place while the water leaves. Most hair types need 15 to 30 minutes. Waves need less. Coarse hair needs more.

What Hair Plopping Is
Plopping means flipping your head forward, lowering your wet hair onto a flat piece of smooth fabric, and wrapping it so your curls dry stacked on top of your head. The hair sits accordioned near the scalp rather than pulled downward by its own water weight.
The fabric matters as much as the position. A regular bath towel has looped terry cloth that grabs the cuticle and pulls curl clumps apart. A cotton T-shirt or microfiber towel has a smooth surface that absorbs water without that friction.
Plopping uses no heat, and it won't build curl into straight strands. It also doesn't replace styling product. Think of it as a setting step: it preserves whatever pattern and product your hair already has while the drying happens.
What Plopping Does to Wet Hair
Plopping delivers three separate results, and knowing which one you care about changes how you do it.
The first is curl definition. Hair sets in the shape it dries in. When wet curls hang loose, the strands elongate and the clumps separate as they dry. Plopped hair dries in its scrunched shape, so the clumps stay intact and the pattern holds.
The second is root volume. Hair that air-dries hanging down dries flat against the scalp. Plopped hair dries stacked on the crown of your head, so the roots set with lift instead of droop.
The third is drying time. The fabric absorbs excess water passively during the wrap window, which shortens whatever comes next. Plopping is a step before air-drying or diffusing. It doesn't replace either one.
Frizz reduction shows up too, but for a mechanical reason. Smooth fabric creates less friction against the cuticle than terry cloth, so the hair surface stays less disturbed. The technique isn't a frizz treatment. It removes one common source of frizz, which is rubbing.
How to Plop Hair: Step by Step
Fresh out of the shower is the right starting point.
Step 1: Style While Soaking Wet
Plopping sets whatever is already on your hair, so product goes on first. Apply your leave-in conditioner, gel, or a styler like our Smoothing Air Dry Cream to dripping-wet hair, then detangle and scrunch to encourage clumps.
Skipping this step is the most common plopping mistake. Hair plopped without enough product comes out with definition that collapses the moment you release the wrap.
Step 2: Lay the Fabric Flat
Spread a T-shirt on the bed, a chair back, or the bathroom counter. If you're using a towel wrap, lay it flat with the elastic loop facing you.
Pick a surface at a comfortable height. You'll be flipping your head forward over it, and hunching mid-plop makes the next step sloppy.
Step 3: Flip and Lower the Hair In
Bend forward at the waist and lower the crown of your head into the center of the fabric. Let the hair scrunch upward toward your scalp as it lands, like an accordion folding, rather than fanning outward.
Don't set your hair down and then press it. Pressing flattens the clumps you built in Step 1, and flattened clumps dry as flattened curls.

Step 4: Secure the Wrap
With a T-shirt, fold the hem over the nape of your neck, twist the sleeves, and tie them at your forehead. Expect to retie it at least once. Cotton knots slip as you move.
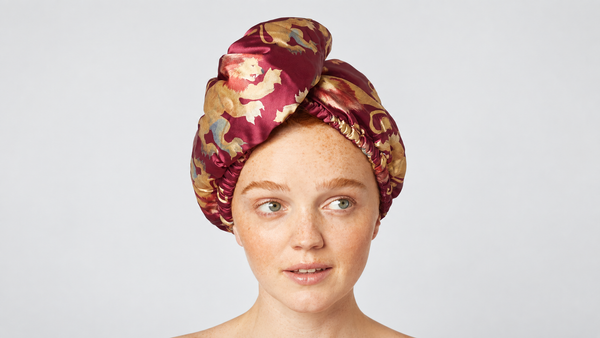
A towel wrap skips the tying entirely. Our Microfiber Hair Towel uses a stretch elastic loop that fastens to a button at the nape, so there's nothing to re-knot mid-plop. If you plop every wash day, that construction difference is the one you'll notice most.
Step 5: Release and Finish
Untie the wrap, bend forward again, and let your hair fall out on its own. Pulling it out disturbs the set.
From there, air-dry fully or diffuse on low with a hover-and-cup motion. Don't brush, comb, or re-scrunch while a gel cast is still wet. Wait until hair is completely dry, then scrunch out the crunch.
How Long to Leave a Plop On
Leave a plop on for 15 to 30 minutes. That window gives the fabric time to absorb excess water and gives your curl pattern time to set without over-drying in a compressed shape.
The right number inside that range depends on your hair. Dense or coarse hair holds more water and can go 30 to 60 minutes. Fine hair dries fast and should stay on the short end, closer to 15.
|
Hair type |
Plop time |
|
Wavy (Type 2) |
10 to 20 minutes |
|
Fine or low-density |
10 to 15 minutes |
|
Curly (Type 3) |
15 to 30 minutes |
|
Dense, coarse, or coily |
30 to 60 minutes |
Both ends of the range have a failure mode. Too short, and the hair unravels still-wet with nothing set. Too long, and the hair dries fully inside the wrap, coming out flattened, crimped, or dented at the crown.
Overnight Plopping: When It Works
Sleeping in a plop works under specific conditions. Your hair should already be 70 to 80 percent dry before you wrap, the wrap should be loose, and the fabric should be low-friction.
Outside those conditions, overnight plopping backfires. Soaking-wet hair sealed inside fabric for eight hours leaves the scalp damp until morning, keeps product from curing, and sets dents into the crown where the hair dried compressed. Fine hair fares worst, waking up flattened rather than defined.
If your real goal is protecting a finished set overnight, that's a different job than plopping. A pineapple, a buff, or a satin-lined sleep cover protects dry curls from friction while you sleep. Plopping sets wet ones. Match the tool to the job.
What to Plop With: T-Shirt, Microfiber, or Towel Wrap
Every plopping fabric trades off across the same four things: how much water it absorbs, how much friction its surface creates, how much hair it can hold, and how securely it stays on your head.
A cotton T-shirt is free and already in your dresser. The flat weave is low-friction, which is why the curly community adopted it. Its downsides are limited absorbency, a knot that needs retying, and a fit that slips when you move around the house.
A standard microfiber towel absorbs far more water than cotton. Our microfiber vs. regular towel guide breaks down the fiber mechanics. The trade-off runs the other direction: on fine hair left wrapped too long, that absorbency can over-dry the set. Smaller sizes also run out of capacity on long or dense hair.
Our microfiber towels use the loop-and-button closure covered in Step 4, which solves the slipping problem cotton can't.

An XL towel wrap or turban adds the two specs that matter most for plopping: a built-in closure and more surface area. For hair past the shoulders, the extra surface area makes the wrap easier to secure and keeps the full length inside without strain. Our Extra Large Quick Dry Hair Towel Wrap exists for exactly that reader.
A satin-wrapped towel wraps an absorbent microfiber core in satin, so satin is what touches the hair. If your main complaint is frizz rather than drying speed, lower surface friction is the spec to prioritize, and that's what our Satin Wrapped Hair Towel is built around. We also make eco-focused versions of the hair towel for low-waste routines.
One fabric is ruled out entirely: the standard terry bath towel. Its looped pile catches the cuticle, separates the clumps you scrunched into place, and roughs up the hair surface. Everything plopping is designed to prevent, terry cloth does.
Plopping by Hair Type
For every texture, the questions are the same: how much water the hair holds, how long the plop runs, and what result to expect.
1) Curly Hair (Type 3 to 4)
Curly and coily hair is the best-case scenario for plopping. Tighter patterns hold more water, tolerate longer windows, and keep their shape under compression. Expect the biggest gains in root volume alongside definition.
Plopping only sets what wash day gave it, so the routine upstream matters. Our guide to the best shampoo bars for curly and coily hair covers that starting point, and our Wavy & Curly Hair collection gathers the products built for these textures.
2) Wavy Hair (Type 2)
Wavy hair is the highest-risk group. Waves flatten or crimp under long compression, so keep the window at 10 to 20 minutes, wrap loosely, and go lighter on product weight.
Micro plopping belongs to wavies. It's a brief scrunch into the fabric for a few minutes, enough to pull excess water without setting a full shape. If regular plopping keeps flattening your waves, micro plopping is the adjustment to try first.
3) Fine or Low-Density Hair
Weight and over-drying are the failure modes here. A heavy, saturated wrap can flatten fine hair as easily as lift it. Keep the plop short, the product light, and release while the hair is still clearly damp.
4) Short Hair
Below roughly chin length, there isn't enough hair to coil onto the crown, so a full plop physically doesn't work. The substitute is a cupped towel scrunch: hold the fabric in your palm and press sections upward toward the scalp for the same friction-free water removal.
5) Straight Hair
Plopping won't create texture where there's no wave pattern to preserve. What straight hair gets from the technique is friction-free drying, which means a smoother surface than rubbing with a bath towel produces. That's a real benefit, but set your expectations at smoothness, no curl included.
Plopping Mistakes That Flatten Curls
Most plopping problems trace back to timing, pressure, or product, and each symptom points to its cause.
-
Hair came out limp. The hair was pressed into the fabric or plopped too long. Lower it in without pressure and shorten the window.
-
Curls fell apart on release. There wasn't enough product on the hair, or the set got touched while still wet. Load product on soaking hair and keep hands off until dry.
-
Dented or square shape at the crown. The hair dried fully inside the wrap. Release while it's still damp.
-
Frizz got worse. The fabric was rough, or the hair got handled during the air-dry stage. Switch to a smooth fabric and leave the set alone.
-
Scalp still damp hours later. The wrap was too tight, or the hair went in dripping. Squeeze out excess water first and loosen the wrap.
-
Nothing changed at all. The hair was too wet to set, too dry to reshape, or the strands are straight. Adjust the starting moisture, or accept that plopping preserves pattern rather than creating it.
Plopping vs. Scrunching vs. Diffusing
These three get framed as rivals, but they're stages of one routine.
Scrunching comes first. It encourages the clumps and the gel cast while your hair is soaked with product. Plopping comes second. It holds that scrunched set in place while the fabric pulls water out. Diffusing comes third, accelerating and finishing the dry without disturbing what the first two steps built.
The only real either/or is plopping versus letting wet hair hang and air-dry unsupported. Hanging hair dries elongated and flat at the root. Plopped hair dries in the shape you gave it.

Building Plopping Into Your Wash Day
Plopping costs nothing but 15 to 30 minutes you'd spend drying anyway, and it asks only for enough product on soaking-wet hair and a smooth fabric with a secure hold. Get those right and the technique mostly runs itself.
It also happens to be a zero-energy drying step, which makes it an easy fit in a low-waste hair routine. If you want the full setup in one place, our Air Dry Bundles pair the styler and the towel so wash day ends with a plop instead of a blow dryer.